Brakes play a pivotal role in your vehicle’s safety. If your brakes are failing, the risk of accidents increases significantly, and repair costs can become a burden. However, brake maintenance and repair don’t always require a mechanic; many car owners can take on these tasks themselves with the right tools, knowledge, and precautions.
In this guide, we’ll explore useful DIY brake repair tips to help you keep your brake system in top condition. We understand how crucial it is to feel secure in maintaining your vehicle, and while some brake repairs should be handled by professionals, others can easily be done at home. This article will teach you which repairs are suitable for DIY, how to execute them, and when to seek expert help.
Why You Should Consider DIY Brake Repairs
Before we jump into the how-to, let’s explore why you might want to take on brake repairs yourself.
Cost Savings
One of the biggest draws for DIY brake repairs is the potential to save money. Professional brake repairs can become quite expensive, especially when the issue is simple enough for you to handle yourself. Tackling the job yourself can allow you to avoid expensive labor costs.
Increase Your Car Knowledge
By learning how your brake system functions and taking the reins on some repairs, you’ll deepen your understanding of your car. Additionally, performing your own maintenance can give you a sense of satisfaction and confidence in your skills.
Peace of Mind
Repairing your brakes yourself can give you control over the process. Once you’re done, you’ll know your brakes are in top condition, giving you both peace of mind and an improved sense of safety while on the road.
When Should You Repair Your Brakes?
It’s essential to know when your brakes need attention. Here are a few signs that it might be time for brake repair or maintenance:
Squealing or Grinding Noises
If you hear squealing or grinding when you apply your brakes, this typically indicates that your brake pads are worn or that debris has entered the brake system.
Vibration or Pulsing
Experiencing vibration or pulsing in the brake pedal? This often points to warped brake rotors, which should be replaced for optimal braking performance.
Reduced Braking Efficiency
A brake pedal that presents as soft or spongy could mean there is air trapped within the brake lines, or low brake fluid. Similarly, if your car takes longer to stop than usual, it could indicate a serious brake issue that needs addressing.
Pulling to One Side
If your vehicle pulls to one side when you brake, this could mean that your brake calipers are not distributing braking force evenly. A brake pad may also be more worn on one side than the other.
Tools and Materials Needed for DIY Brake Repair
Before you begin working on your brakes, ensure you have all the necessary tools. Here’s what you’ll need:
- Jack and Jack Stands: To lift and stabilize your car safely.
- Lug Wrench: For loosening wheel bolts.
- Brake Cleaner: To clean the parts and remove dirt, grease, or contaminants.
- Socket Set: For removing and replacing parts.
- Torque Wrench: To tighten bolts to the correct specifications.
- New Brake Pads: If you’re replacing worn pads.
- Brake Rotors (Optional): If rotors need replacing.
- C-Clamp or Brake Pad Spreader: For compressing the brake caliper piston.
- Anti-Squeal Lubricant: To lubricate the back of the pads and minimize noise.
Step-by-Step Guide to DIY Brake Repair
1. Safety First: Preparing the Vehicle
Your safety is the top priority. Here’s how to start:
- Park on a Flat Surface: Ensure your car is on stable ground to prevent it from rolling.
- Engage the Parking Brake: This will keep the car from moving while you’re working.
- Wear Protective Gear: Gloves and safety glasses are essential to protect against brake dust and other debris.
2. Lifting the Vehicle
Now, it’s time to lift the car for access:
- Loosen the Lug Nuts: Before raising the vehicle, slightly loosen the lug nuts with a lug wrench, but don’t fully remove them yet.
- Lift the Car: Use the jack to lift the car. Once elevated, position the jack stands under the vehicle for added stability.
- Remove the Wheel: With the car securely supported, remove the wheel to expose the brake system.
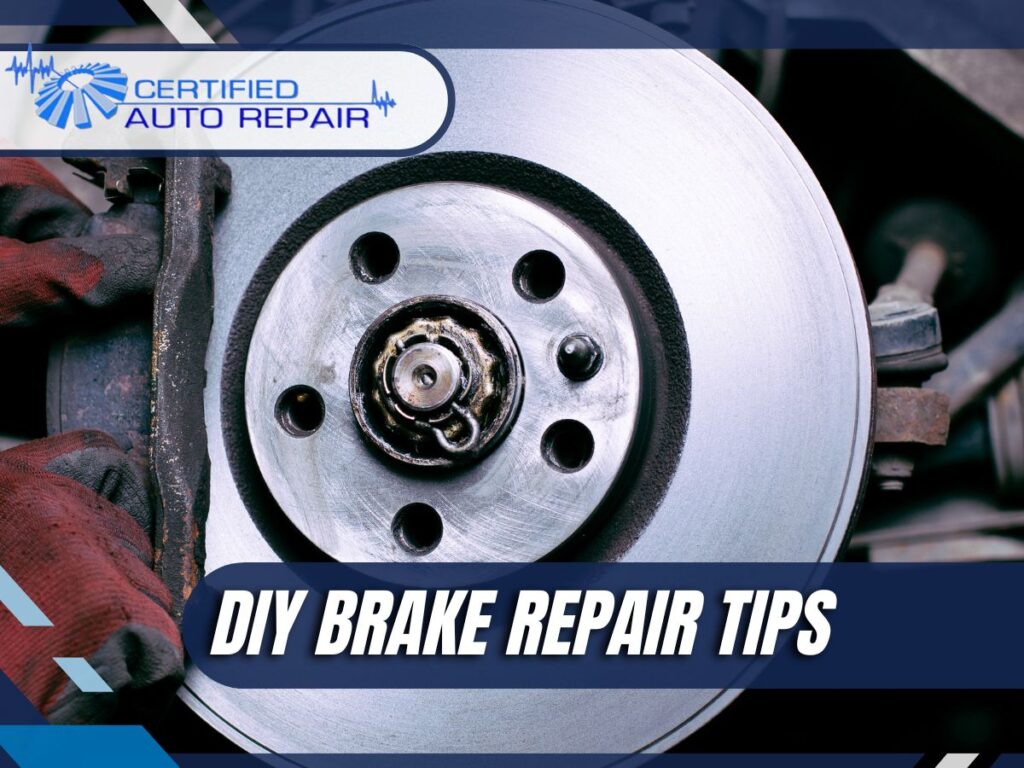
3. Inspecting Brake Pads and Rotors
Before removing any parts, inspect the condition of your brake pads and rotors:
- Brake Pads: Check the thickness of your pads. If they’re thinner than 1/8 inch, they need replacing.
- Rotors: Look for grooves, cracks, or warping in the rotors. These may need resurfacing or replacement.
- Brake Fluid Leaks: Check for any visible leaks around the brake lines. If you spot any, address them before proceeding.
4. Taking out the old brake pads
To replace the pads:
- Remove the Caliper: Use a socket wrench to remove the caliper bolts. Once loose, carefully slide the caliper off the rotor, supporting it with a bungee cord or suspension hook—do not allow it to hang by the brake line.
- Remove the Brake Pads: The pads should slide out easily. If they’re stuck, gently pry them loose with a screwdriver.
5. Installing New Brake Pads
To install the new pads:
- Insert New Pads: Slide the new brake pads into the caliper bracket, making sure they align properly.
- Compress the Caliper Piston: Use a C-clamp or brake pad spreader to push the caliper piston back into place. This creates enough space for the new, thicker pads.
- Reattach the Caliper: Place the caliper back over the pads and secure it with the caliper bolts.
6. Replacing the Rotors (If Necessary)
If your rotors need to be replaced:
- Remove the Old Rotor: Use a socket wrench to remove the retaining bolts. If the rotor is stuck, gently tap it with a rubber mallet to loosen it.
- Install the New Rotor: Fit the new rotor onto the hub, ensuring it’s seated properly, and reattach the retaining bolts.
7. Reassembling the Vehicle
Once the pads and rotors are installed:
- Reinstall the Wheel: Place the wheel back onto the hub and hand-tighten the lug nuts.
- Lower the Car: Bring the car back down using the jack, and then pull out the jack stands.
- Tighten the Lug Nuts: Use a torque wrench to fasten the lug nuts to the manufacturer’s recommended specifications.
8. Test the Brakes
Before you drive:
- Pump the Brake Pedal: This ensures the brake pads settle into position and builds brake fluid pressure.
- Check for Abnormal Noises: Start the vehicle and apply the brakes gently, listening for any unusual sounds. If all sounds normal, you’re ready to go.
Case Study: DIY Brake Repair Success
Mark, one of our customers, brought in his car due to a high-pitched squeal when braking. Upon inspection, we found that his brake pads were severely worn. Mark, an experienced DIYer, chose to replace the pads himself. He followed our guide to carefully remove the old pads and install new ones. After the repair, Mark was thrilled to report that the squealing stopped, and his car was driving smoothly again—he had saved money and learned new skills in the process.
Should You DIY Your Brake Repair?
Brake repair is vital for your vehicle’s safety, and while some repairs are best left to professionals, many can be tackled by experienced DIYers. Replacing brake pads, rotors, and performing basic brake system checks are tasks you can confidently handle at home if you have the right tools and knowledge.
Before beginning a DIY brake repair, assess whether you have the necessary skills and tools. If you’re unsure or encounter a problem, don’t hesitate to contact a professional for assistance.
Frequently Asked Questions (FAQs)
1. How do I know when my brake pads need replacing?
Brake pads should be replaced when they’re less than 1/8 inch thick. You may also hear squealing or grinding noises indicating they are worn.
2. Can I drive with worn-out brake pads?
It’s not advisable to drive with worn brake pads, as they can damage the rotors and compromise your stopping power, creating safety risks.
3. How often should I check my brakes?
Inspect your brake pads and rotors every 10,000 miles, or sooner if you notice issues like noise, vibration, or reduced braking efficiency.
4. Can I replace just one brake pad?
It’s best to replace both brake pads on the same axle to ensure even braking and avoid performance imbalances.
5. What should I do if my brake fluid is low?
Low brake fluid may indicate a leak or other issues. Refill the fluid, check for leaks, and have your brakes inspected by a professional if necessary.